Showing posts with label Recipe Review. Show all posts

07 May 2012

Recipe: Squash Patties


Several people have emailed me about this recipe, so I thought it would be easiest to just post it. I typically make huge batches of this in the summer and freeze to cook throughout the year. It multiplies beautifully and doesn't have to be particularly exact. We're not big onion fans, so I usually skip the onions & double up on the green peppers. Enjoy!


Southern Summer Squash Fried Patty Recipe:

  • 2 cup summer squash (cooked and mashed or blended until fairly smooth)
  • 2 eggs (beat well)
  • ¾ tsp salt
  • ¼ tsp pepper
  • 1 TBSP sugar
  • 2 TBSP milk
  • ¼ cup onion (chopped fine)
  • ¼ cup green pepper (chopped)
  • 1 cup self-rising flour
1. Cook and mash squash or thaw and drain pre-prepared squash.
2. Beat the egg and add salt, pepper, sugar, and milk.
3. Stir in onions and green pepper.
4. Sir in self rising-flour until smooth.
5. Cover bottom of a skillet about 1/8 inch with vegetable oil or a combination of oil and butter and heat to medium.
6. Use a small measuring cup or large spoon to drop batter into hot oil where it will cook similar to pancakes or potato pancakes. Tap lightly on top and around edges immediately after dropping the batter if it does not spread neatly.
7. Fry until brown on bottom (edges will start to look firm and set) and then flip and brown the other side.
8. Place fried patties (makes around 6) on a plate covered with a paper towel to absorb any excess oil.

To freeze: Scoop batter onto cookie sheets, flash freeze patties until hard frozen, then transfer to freezer bags and freeze.


Not sure of the source - sorry!

01 June 2011

Recipe Review: Chicken Pizza

I had a few pieces of grilled chicken leftover from the Memorial Day cookout that needed to be eaten. Combine that with a few packets of pizza dough yeast that needed to be used and I came up with an easy, delicious supper, mostly adapted from here.


Here are the basics:
1. Make your pizza dough (or use the kind from a can) & bake for 5-7 minutes.
2. Brush with ranch dressing, then layer mozzarella cheese, shredded chicken, diced tomatoes & red peppers (had both on hand that needed to be used), then top with cheddar cheese.
3. Bake until it's done (about 13 more minutes in our case).

This was SO yummy and SO easy! Love that it used up lots of stuff in the fridge that needed to go. 

04 May 2011

Recipe Review: Strawberry Fruit Leather

Strawberries

We recently visited to our local Strawberry Farm for our annual strawberry picking. Well, it turns out we were there on BARGAIN DAY - yay!!! They picked too many strawberries the day before, so all the day-old pre-picked berries were half-price. They still looked good, so that's what we chose to buy. 

Strawberries

After making 19 half-pints of jam, we still had plenty more berries to use. I didn't want to freeze them, so I looked into making Fruit Leather. I've never done that before, but I was intrigued. Typically it's made in a food dehydrator, but I don't have one so I looked into doing it in the oven. I combined several variations of instructions I ran across here, here, and here, so I'm including what I did below. 

Fruit Leather Recipe

Ingredients
  • Strawberries
  • Water
  • Lemon Juice
  • Sugar (optional)
Directions
  1. Rinse the berries, cap and quarter them.
  2. Place berries in a large covered sauce pot on medium heat. Add half-cup of water for every 4 cups of fruit. Bring the berries to a simmer and let them cook down for 10-15 minutes.
  3. Either mash in pot or pour into blender/food processor and work until smooth.
  4. If you or your kids are particularly sensitive to seeds, strain through a cheesecloth to remove. I didn't worry about this.
  5. At this time, preheat your oven to 120degrees (note: my oven wouldn't go below 170, so that's what I used).
  6. Add sugar to taste. I found that 1/4cup of sugar for every 4 cups of berries worked well for us.
  7. Add lemon juice. I just did a hefty splash.
  8. Simmer fruit until sugar is dissolved and mixture has thickened. About 5-10 minutes.
  9. Line baking sheet with butter parchment paper. Pour the fruit mixture onto the parchment paper to 1/8inch thickness. (Typically, about 4 cups of cut fruit will fill one baking sheet).
  10. Bake for a LONG time. I saw times ranging from 10-12 hours. Since my temperature was a bit higher, mine didn't take quite that long - probably closer to 6-7 hours. 
  11. You'll know it's ready when it's dry. Sometimes the edges were ready before the middle, so I just cut it and let the wetter parts in there so the edges didn't overcook.
  12. Cool and peel off parchment paper. I used kitchen shears to cut into ~6inch long x 1in wide strips, then stored 5-6 strips in FoodSaver bags. Others rolled theirs up in plastic wrap - whatever you feel comfortable with. I'm hoping mine won't be stuck together when I take them out of the freezer, but that may backfire - we'll see.
From what I read, it's OK to keep them at room temperature for 30days in an air tight container. If you made a large batch and want to store them for longer (like I did), then they need to be frozen. 

Strawberries
Strawberry Puree before it's dehydrated

Strawberries
Dehydrated and Cooling

Strawberries
Pulls off parchment paper in one big sheet

Strawberries
Then cut into small strips

The fruit leather turned out AMAZING! They taste just like a fruit roll-up (according to my husband). Thankfully this chewy candy is full of fruit and not yucky stuff like high-fructose corn syrup.

Strawberries
Sealed in FoodSaver Bags


Here is a chart of various fruits and how well suited they are to make fruit leather. 


Fruit

Suitability for Fruit Leather
ApplesExcellent
ApricotsExcellent
AvocadosNot recommended
BananasFair to good
Berries with seedsExcellent
BlueberriesOnly in combination
CherriesExcellent
Citrus fruitsOnly in combination
Citrus peelOnly in combination
CrabapplesOnly in combination
CranberriesOnly in combination
GrapesFair to good
GuavasOnly in combination
MelonsNot recommended
NectarinesExcellent
PeachesExcellent
PearsExcellent
PineapplesExcellent
PlumsGood
StrawberriesExcellent

We'll definitely be trying out some other flavors of fruit leather as the season continues!

29 April 2011

Recipe Review: Taco Salad

In this weeks MPM post, I mentioned a couple of salads were gracing our table since we are currently overrun with lettuce from the garden. Much to my surprise, I received a few inquiries about these salads, so I figured I'd post the recipes (well, they're more like non-recipes, but whatever). Here's the first...

Note 1: I like to serve buffet style because it puts up easier this way if there are any leftovers. Eating cold taco meat on leftover salad is just gross, so this way you can easily reheat the meat.

Note 2: I'm allergic to corn & corn products, so this is a completely corn-free taco salad (I thought you may find that odd if you didn't know the back story).

Ingredients:
Lettuce
Diced Veggies: Cucumbers, Tomatoes, Red Bell Peppers, (any additional veggies you want)
Taco Meat - We love McCormick's Cheesy Taco Seasoning. (We usually only eat about half, so I freeze the other half for another taco night.)
Shredded Cheese - I used Monterey Jack & Sharp Cheddar (for the love of all delicious queso, please shred your own!)
Ranch Dressing (we make our own from the dry ranch seasoning - it's so yummy!)

Directions:
1. Put lettuce in bottom of your bowl/plate.
2. Add taco meat & veggies.
3. Top with shredded cheese.
4. Put a smidge of ranch dressing on top - really brightens up the flavor!
5. Mix up & enjoy!


I think the Texas Toast Tortilla Strips or a few tortilla chips would add a yummy, salty crunch to this salad (although I'm just guessing since I can't eat those products).

This also serves up great on wraps if you're looking for a leftovers use for lunch the next day.

28 February 2011

Recipe Review: Fried Pork Chops

I have some things going on that have left me in a non-bloggy mood recently, but I did want to share this quick recipe review with you. 

In celebration of these beautiful 70-degree days we've been having lately, we were going to grill pork chops tonight. Well a huge line of ugly storms blew through for a few hours cancelling those plans. Instead, I decided to forfeit my house over to the smells of hot grease mixed with flour and fry them (hello calories, you are delicious!). I used this Paula Deen Recipe and it was absolutely amazing! I let them sit in the buttermilk for a while and I think that really helped. So yummy!!

I didn't take any pictures, but they looked quite similar to these.

And now I'm off to burn every candle in my house hoping the smell will dissipate soon...

22 December 2010

Recipe Review: PW's Cinnamon Rolls & Cinnamon Bread

I spent today pretending I was the Pioneer Woman by trying my hand at her Cinnamon Rolls and her Cinnamon Bread. I love her blog and have her cookbook. When her novel comes out in a few months, it will be on my "To Read" list. Just love her!

First off I must confess that I was SCARED of both of these recipes because they use yeast. Yeast & I are usually not friends unless I can dump it in my bread machine. However, I have officially conquered my fear because both turned out marvelously!

I did learn a bit as I went along with the Cinnamon Rolls, which are delicious, but have unholy amounts of butter.  Here is some of the mess from my first round of dough with insane amounts of butter, sugar, and cinnamon. She warns that some of the filling may spill out...little did I know how much!

Island-o-Mess

Excess Filling

Dripping down the cabinets...

all the way to the floor!

The taste and quantity more than makes up for the mess. I made 7 pans of Cinnamon Rolls (2 large rectangular, 1 medium square, 4 rounds), sent some to the neighbors for Christmas, some are going with my hubby to the office tomorrow, some are staying here for us to eat on, the rest are in the freezer.

Only one of my pans actually looked "pretty" and nicely rolled, but I think taste of appearance wins out here (not to mention the maple glaze sort of covers any imperfections).

I don't have any pictures of the finished rolls or bread, but just know they are wonderful!! They are not overly sweet, just pure deliciousness! 

Update: Here's a picture of the cinnamon rolls...yummy!
PW Cinnamon Rolls

16 December 2010

Recipe Review: Meatloaf Muffins

I saw someone mention "Meatloaf Muffins" on Twitter the yesterday and asked about it because I'd never heard of it. They said it was just regular meatloaf in muffin tins instead of a big loaf - cooks much faster. Well, it was 5:15pm and I hadn't cooked the chicken for our Chicken Pie, but I did have a defrosted pound of hamburger so I thought I'd give it a whirl. 


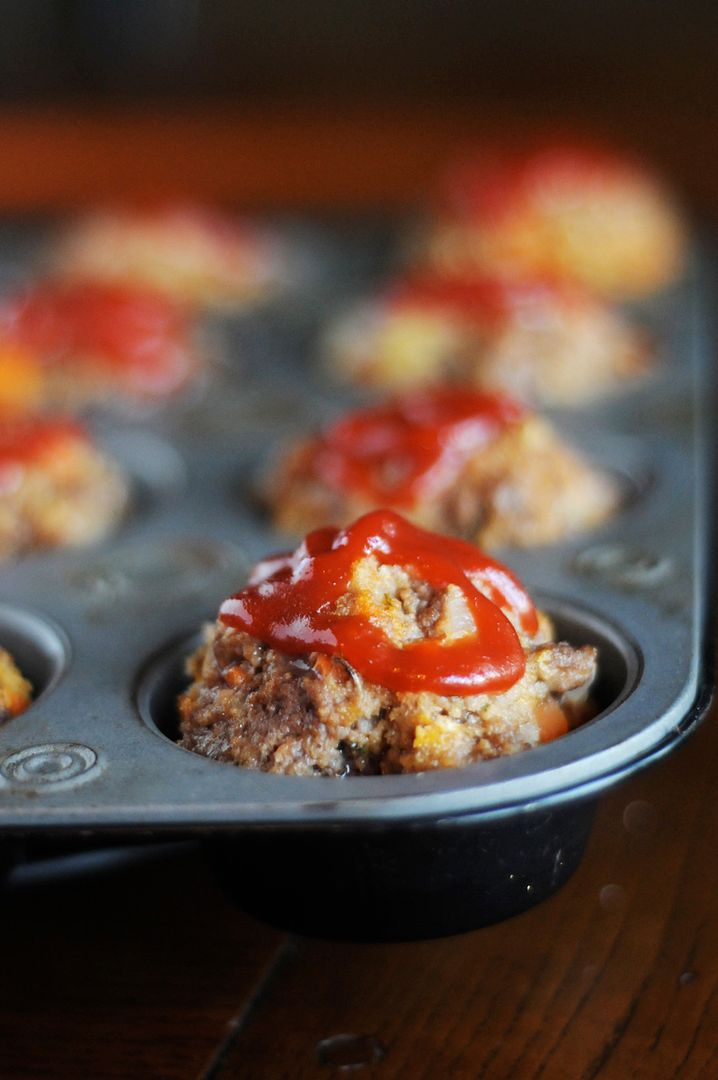
It was DELICIOUS!! We ate our's too fast to snap a photo, but here's a picture from another blogger (her recipe sounds tasty too!). I want to remember just how I did it, so here's my super simple version of the recipe.

Ingredients:
Hamburger (1 lb)
Condensed Tomato Soup (1 can)
Dijon Mustard (~2 tbsp)
Dried Minced Onion
Garlic Powder
Salt
Pepper
Ritz Cracker Crumbs (1/2 sleeve crushed) - I'm sure bread crumbs would work too, but I didn't have any.

Directions:
Combine all ingredients in a bowl.
Portion out into 12 muffin cups.
Bake at 350 for 25-30 minutes.
Top with ketchup for 10 more minutes.

ETA: Instead of just ketchup, I mixed ketchup, apple cider vinegar, & brown sugar to pour over top for the last few minutes. YUM! 


I served these with homemade baked Mac & Cheese (from Trisha Yearwood's Georgia Cooking in an Oklahoma Kitchen) and green beans (canned from the garden this summer). A delicious, hearty meal for a C-O-L-D winter night.

10 December 2010

Recipe Review: Stuffed Pizza Bites

I tried out a new recipe on our menu plan this week, Stuffed Pizza Bites, and they were a HIT! My Little Man can be quite picky if he doesn't like the look of something, especially if it's something he hasn't seen before, so I held little hope for him to actually eat one when I put it on his dinner plate. Much to my surprise and delight, he took a bite and said, "Yummy!". He then proceeded to eat SIX more. This will definitely be on our menu again.


I filled my version with mozzarella and mini-turkey pepperonis. However, since these were such a hit I'm planning to make several more versions in hopes to get my Little Man to eat a few foods he wouldn't normally eat. I'm thinking chicken, cheese, & broccoli or maybe ham & swiss. There's another version here that looks great too!

30 November 2010

Recipe Review: Big, Fat, Chewy Chocolate Chip Cookies

Emphasis on BIG...and chewy....and delicious! And I'm sure fattening too, but let's just ignore that one.


I made these cookies tonight and they are probably the best chocolate chip cookies I've ever made. After reading over some of the reviews and suggestions, I decided to let my eggs come to room temperature and let the melted butter cool a bit. Other than that, I followed the recipe exactly and they are yummy! They are very chocolaty, which is fine by me, but it wouldn't hurt them to have a few less chocolate chips.

Warning: they are HUGE. I can be a bit of a cookie monster and I couldn't eat a whole one alone (my husband was happy to help out). This pan usually holds at least 15 regular size cookies, but barely held 8 of these cookies.


They are so big they seem sort of "gourmet", so I'm thinking wrapping a few in a cellophane bag with a pretty ribbon would make an excellent gift for the holidays. Sort of like this, but with a BIG ribbon because that's how we do it in the south!


10 October 2010

Recipe Review: Butterhorns

I've been meaning to try out Life As Mom's Butterhorn Recipe for a while since my hubby LOVES crescent rolls. I finally pulled out my bread machine today and tried it out. They were a hit!


The recipe makes 32 butterhorns. I made 8 fresh for dinner tonight (4 regualar, 4 chocolate for dessert) and froze the rest. Now, let's hope I remember to pull some out enough hours in advance to enjoy them with future dinners!

16 August 2010

Recipe Review: Cheesy Sausage English Mufflins

This is a recipe my mom has been making for us since we were kids. We loved it then and still love it to this day (she made them last weekend when we were visiting...yummy!). They are perfect to make ahead of time, keep in the fridge or even freeze (which is what I did). Here's the recipe.


Ingredients:
Breakfast Sausage (hot or regular...your preference)
Velveeta
Cream Cheese
English Muffins
Shredded Cheese

Directions:
1. Brown sausage and drain fat.
2. Return sausage to pan, then add Velveeta & cream cheese to your liking (For 2lbs of sausage, I used about 1/3 big block of Velveeta and 1/3 block of cream cheese - both cut into small chunks). Melt cheeses in pan with sausage until completely combined. Remove from heat.
3. Split English Muffins in half, then spoon sausage mixture on top.
4. Top with shredded cheese.

ready to be baked or frozen - your choice!

To bake now: put in oven at 350 until cheese is melted and slightly brown.

To freeze: flash freeze, then transfer to freeze bag or freezer safe Tupperware. To eat one, take out and microwave for about 30 seconds, then put in oven/toaster oven to crisp up. To eat many, let sit out for a few minutes, then bake in 350 oven until cheese is melted and slightly brown.


You can really kick this recipe up a notch by adding some Rotel...YUMMO!

Recipe Review: Whole Wheat Blueberry Pancakes


I frequently make up a big batch of pancakes, flash freeze, then we'll eat them for breakfast. This is a favorite of both mine and Little Man's. I was trying to think of a way to make them a little healthier, so I tried out this Whole Wheat Pancake recipe and added blueberries. Verdict: Little Man LOVED them and I did not. Glad he likes healthy things...I'll stick to my regular pancakes, thank you very much!

22 April 2010

Recipe Review: Granola

I love granola, but not all "fru-fru"-ed up. I don't like all the mix-ins such as coconut, almonds, etc. So I was ECSTATIC to find this yummy recipe. It has been a hit with all three of us and my gallon size bag is almost all gone. I LOVE to watch Little Man eat this - he's too funny trying to eat every last oat. I'd definitely recommend trying it out - it's super easy to make and delicious!

If I feel really wild next time I make it, I may throw in some Craisins. :)

09 April 2010

Bread Machine Love & Recipe Review: Cinnamon Rolls

As part of my domestic cooking endeavors, I've been wanting to make some homemade baked goods, especially breads and doughs. Not only is it less expensive to make your own, but you're free of the weird chemicals and preservatives too. I've found out that I'm not the best at doing that by hand...too impatient and not precise with water temps & yeast. So I decided I wanted to try a Bread Machine.

My MIL let me borrow her machine that was collecting dust somewhere in her basement. I liked it and had some success, but I rarely wanted to make something and actually bake it in the bread machine. Mostly I was finding recipes for doughs to be made in the machine, then pulled out and baked in a different way (pizza dough, rolls, cinnamon buns, etc). Many bread machines have a "Dough" setting, unfortunately MIL's did not so I had to constantly check on it. So I decided I needed wanted a bread machine with a Dough cycle.

I started perusing and found out that these machines are NOT cheap. I found some for more than $200 - yikes! The cheapest I found was a $60 machine on sale at Walmart for $45. I almost bought it. Came thisclose. But I had a hard time justifying spending $45 when I had a perfectly good machine at home (just no dough cycle).


Exactly one week later, the heavens shone down upon me in a Goodwill. I found this perfectly good, compact bread machine for $7.99 and it had a DOUGH CYCLE!!!


After plugging it in to make sure it still worked, this baby went home with me. I cleaned it up this week, downloaded the manual online, and decided my first endeavor should be Cinnamon Rolls. I used this recipe from Good (&Cheap) Eats. FishMama is a big believer in Bread Machines and has a great post with quite a few recipes here. Here the Cinnamon Rolls are before I baked them this morning. No after photos...I don't want to display the carnage that went on! Needless to say, they were TASTY!


Surprise! These are made with wheat flour and old-fashioned oats in them. Gotta do something to amp up their nutritional value with the butter and sugar that's in these!


The icing calls for Powdered Sugar. I don't keep Powdered Sugar on hand and don't use it because it has corn starch in it (I'm allergic to corn). I found a great post over at the Pioneer Woman's Tasty Kitchen on how to make you own Powdered Sugar. It is SO EASY and CORN FREE!

After seeing many recommendations for The Bread Lover's Bread Machine Cookbook on various blogs, I checked it out from the library this week. I plan on trying out a few recipes to decide if I buy it - want to make sure it's worth it. I'll let you know how some of those go!

I've linked up to Frugal Friday over at Life As Mom since I'm so proud of my frugal Bread Machine Purchase!

29 March 2010

Recipe Review: Grilled Pimiento Cheese Sandwiches

Store-bought Pimiento Cheese is for the birds in my opinion, but Trisha's Pimiento Cheese is a family favorite around here. Super easy & super delicious.

Saturday night, the hubs and I were out on a date at a local restaurant & brewery. I'm not a beer drinker, but my hubby really likes their beer and the food is yummy. It's also a bit different, so I love to look over their menu. One item really caught my attention this weekend: Grilled Pimiento Cheese & Bacon sandwich. Hmmm...I love grilled cheese and I love bacon, but I never thought of a grilled P-cheese sammy. I wasn't in the mood to order that, but I had to try it at home on Sunday since we had a big bowl of P-cheese just waiting in our fridge.

I'm not sure I'd call this a "recipe", but here's what I did.
1. Start by heating up your George Foreman Grill (or equivalent...I think mine is Hamilton Beach).
This is my secret weapon to making several Grilled Cheese Sammies at once without making a mess. I never use butter this way either and think they're just as delicious (& healthier!) without.

2. Spread delicious Pimiento Cheese on one slice of bread.
3. Cook 2 slices of bacon, drain, break in half, and put on the other slice of bread.
4. Put together to make P-cheese & Bacon sandwich.
5. Insert into grill for 2-3 minutes. Just enough to get the bread browned and warm up the cheese a little bit.
6. Serve up and enjoy!

My hubby was pretty skeptical, but after he finished he said it was like a slice of heaven! Seriously, this was delicious and we'll be eating these more often. Without the bacon would have been good too. 

02 February 2010

Recipe Review: Monster Cookies


Is your mouth watering yet? Maybe not...those cookies aren't the most beautiful things in the world, but they are pretty tasty. My favorite part about these Monster Cookies - they are Gluten Free! My mom has Celiac Disease, which means she can have no gluten (mostly flour) and I have a corn allergy (no corn products), so we are often at an impasse when it comes to foods we can both eat. These fit the bill! Plus this made a ton, so I will be freezing some to pull out in a week or two when we're ready for something sweet or the next time Mama Linda visits.

26 January 2010

Recipe Review: Buffalo Burgers


So let's first clear up that when I said we were having Buffalo Burgers, I did not mean meat that came from the animal. I actually have had Bison Burgers and although not terrible, I certainly won't be ordering one anytime soon.

I meant Buffalo as in Buffalo Wing Sauce. I had a Buffalo Burger last week when visiting my parents from one of our local favorites and decided I needed to recreate them this week. We ended up having them tonight and they were delicious!  Here's how I did it...

Ingredients:
Hamburger Patties
Buffalo Sauce (I use Franks)
Blue Cheese Crumbles
Buns

Directions:
1. Make & cook hamburger patties as usual. I made mine very plain...just 80/20 ground beef with some cold water mixed in (a trick I learned from my MIL - makes them very moist & juicy).
2. Heat some Buffalo Sauce in a small shallow dish in the microwave (15 seconds - just enough to warm it a bit). Dredge the cooked hamburger patties though the sauce and place on baking sheet.
3. Top with Blue Cheese Crumbles. Put under broiler until Blue Cheese starts to melt & bubble a bit.
4. Put Buffalo Burgers on buns & serve!

I served these with baby carrots (no celery here, I find it repulsive!) and fries (which I abstained from - yay me!). Sorry there are no pictures, we gobbled them up too fast!

13 January 2010

Homemade Chicken Nuggets


Little Man rarely eats meat, with the exception of Chicken Nuggets. Maybe that sounds like your toddler too. I was searching for a healthier & cheaper version of chicken nuggets to feed him without much luck. One day I decided just to wing it. The results were delicious! My husband has requested they go into our regular menu line-up. I'll probably oblige because they are so easy & tasty.  They're not pretty, but their taste more than makes up for the presentation. I thought I'd share my "recipe" (if you can even call it that!) with you.

Ingredients:
Boneless, Skinless Chicken Breast
Italian Dressing
Plain Bread Crumbs
Seasoning Salt
Oil (I used Canola)

Directions:
1. Using a knife or kitchen shears, cut chicken breast into bite-sized pieces.
2. Marinate chicken pieces in Italian Dressing for at least an hour.
3. In a gallon size Ziploc, pour bread crumbs (between 1/2 - 1 cup) & seasoning salt (to taste, probably between 1tsp & 1tbsp).
4. Put chicken pieces in bag & shake to coat.
5. Put about 1tbsp of oil in skillet over medium heat.
6. Put chicken pieces in skillet, cooking 1-2 minutes per side. Then turn to brown on all sides. You may need to add more oil as you're cooking.
7. Once chicken is cooked through, remove to a paper towel to drain off any excess oil.
8. Eat & enjoy!

I put these in the freezer & heat a few up at a time for Little Man. Definitely a delicious, quick meal!

12 January 2010

Homemade Applesauce

My Little Man LOVES fruit. I mean the child is obsessed. I literally have to hide fruit until he has finished eating everything else I want him to eat and then bring out the fruit. I also have to sneak fruit into our cart out of his sight at the grocery store or he'll throw a fit. Obsessed, I'm telling you. 


With his love of fruit also comes a love of applesauce. Normally I buy huge jars of unsweetened applesauce and it that jar might last a week. Thank God that store brand applesauce is not expensive. It is processed though, even the unsweetened variety. I'm always looking for healthier foods for our family (especially Little Man). Well, I found a great deal on apples this weekend so I bought 9lbs and made some applesauce last night. Then I canned it. 


I have fallen in love with canning. Do you can? If not, you should give it a try. It's easy & can save your family lots of money while providing delicious, healthier foods. I want to show you just how easy canning is. A winter lesson on canning - ha! Can you tell I'm itching for some warmer weather? :)


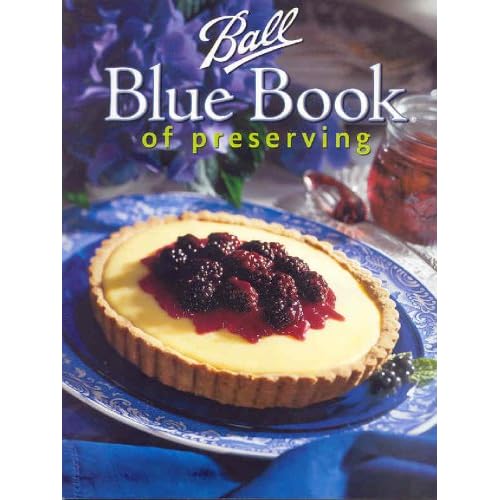
Step 1: Buy this book. I call it my canning Bible. It's awesome & inexpensive. It's also pretty timeless, so it should be good forever.


Step 2: That book will tell you to buy (or borrow) these basic products...I'm sure all of this can be found at your local Wal-Mart
-Boiling Water Bath canner (similar to this one)
-Mason Jars with rings & new seals (I bet if you ask around, you'll find lots of people with mason jars they want to get rid of)
-Wide-mouth Funnel (like this)
-Jar Lifter (like this)


Step 3: Follow the instructions in the book. I would love to tell you exactly how to can, but the process really depends on what you're canning. It's not hard - I promise. 


I used the instructions in that book to make Little Man's applesauce. Here's what I did...


Gather lots of apples...I like to use 3 different varieties & at least one of those need to be Granny Smith. The others don't really matter, but I never use more than one type of red apple.


Wash the apples because they are yucky & usually coated in wax or food-grade shellac. Disturbing. Don't worry...you're going to peel them. But think twice before you eat the peel of an apple again.


Pull out the Peeler-Corer-Slicer that your grandmother gave you (or take a million hours to do this process by hand...your choice).


Put the slices in a big pot with some water, but not much because apples are like 67% water anyway. Turn on the heat to medium-high. Stir frequently getting the top apples to the bottom.


See how they are starting to turn brown...yuck! I sprinkled some of that "fruit saver" stuff on top. Not much, but enough to stop that color change.


While your apples are cooking down, gather up your old friends...

These were so handy when I was living in Canning-ville this summer. While residing in Canning-ville, I produced the following:
Bread & Butter Pickles: 15 pints
Kosher Dill Pickles: 14 pints

Okra Pickles: 4 pints
Salsa: 16 pints, 13 half-pints
Pasta Sauce: 1 quart, 32 pints, 1 half-pint
Pizza Sauce: 10 half-pints
Chili Base: 19 pints, 1 half-pint
Green Beans: 23 Quarts
We have been enjoying these throughout the winter. All the hard work & late nights were definitely worth it!


Oh Canning-ville how I miss you, your fresh fruits & veggies, and most importantly your warm temperatures. Please return soon!


Ok...back to the present. Now prepare your jars, lids, & new seals. Basically you put them in hot water (but not boiling) until you're ready to put your applesauce in them. (Sorry there are no pictures for these next few steps - You have to work quickly & hubs wasn't home to help take them while I worked)


I pureed the cooked apples in my food processor, then returned the puree to the pot & brought to a boil. This is where I burned myself BIG TIME. Ouch - be careful with boiling applesauce.


Put your applesauce in your jars. Put the seals & rings on the jars. Put sealed jars in your boiling water bath canner & process for 20 minutes. Remove jars & let them sit for a while (like until the next morning) until the jars seal. You'll hear a pop - it's a great sound because that means it worked!


Here's your finished product...a beautiful quart of applesauce!


Well, actually three beautiful quarts of applesauce and a big bowl full leftover. It takes 2.5-3.5lbs of apples to make one quart of applesauce, which may seem like a lot of apples for not a ton of sauce. But I promise, it's worth it!  Notice I added no sugar and it is delicious!


I really wanted to make fruit leather, but I didn't have parchment paper on hand & I was afraid to try it without.

08 January 2010

Recipe Review: Homemade Pizza Success!

I have not had much luck making homemade pizza in the past. I just never get the dough quite right. Since I'm eating from the pantry this month and I had all the ingredients on hand, I decided I'd try it again.

I used the pizza dough recipe over at Little Birdie Secrets. SUCCESS! I threw in some garlic powder and Italian seasoning with the dough, which gave it a delicious flavor.I topped it with homemade pizza sauce (that I canned last summer), freshly grated mozzarella, and mini-pepperonis that I had leftover from a Sicilian Strata I made around Christmas. I was so surprised that you cooked it at such a high temperature (500-degrees!) the entire time, but that must have been the secret. My only complaint was the center was a little doughy,  not much, but not as done as I'd like. Next time I think I'll pre-cook it for 4-5 minutes instead of just 3.

Sorry there's no picture - it was gobbled up too quickly to snap one!